|
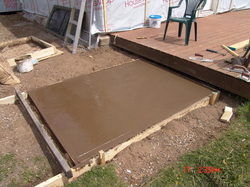
I should likely start at the beginning with how we constructed the oven. It needs a good strong base; 6" of re-enforced concrete. Building an oven, particularly when using concrete and cement is a somewhat slow process, given that you need to wait for the concrete to set before moving on to the next step. Thus, I let the base pad cure for a couple of weeks before continuing with the build.
|
 |
|
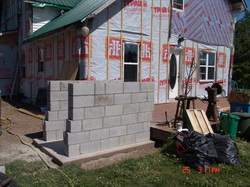
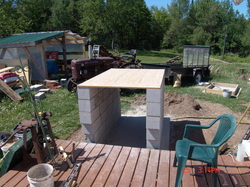
Now it's on to the two short block walls that will support the hearth slab at a good working height. Since we would be working from the deck level we determined that a good height for the finished hearth level would be about 37", a couple inches higher than a standard kitchen counter. We choose this height so that bread could be loaded comfortably and we wouldn't need to bend over very far to see into the oven.
Debbie is shorter than I am so the height is a compromise, although currently I do most of the oven work. |
|

|
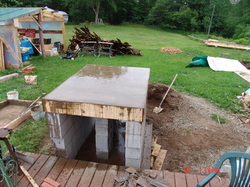
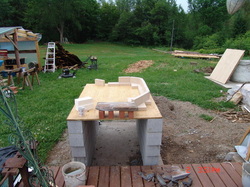
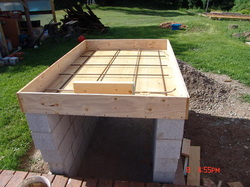
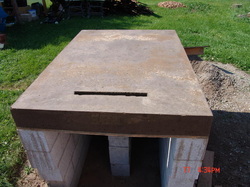
On to the hearth slab, another 6" of re-enforced concrete. At this stage we also did a rough layout of the oven hearth itself so we knew how best it would work and to confirm the quantities of fire brick, in particular, we would need.
Once that is done we can construct the form, with rebar in place and a block for the ash slot. Then it's time to pour the concrete. After another couple of weeks, to let the concrete set well, the form is pulled apart and the block for the ash slot is knocked out. I added a temporary row of block in the center of the base to provide support while the concrete is poured and to prevent any sagging due to the weight. The base form plywood extends over the block walls. The hearth slab is not attached to the walls and just sits on top of them. This means I can move the oven if I so choose. I removed that plywood by cutting the center section of the plywood out, then using a hydraulic jack, lifted up each side of the hearth slab and took out the piece of plywood remaining over the block wall. |
|

|
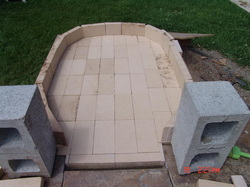
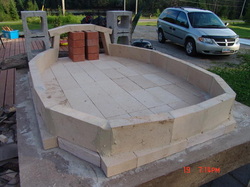
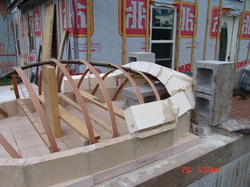
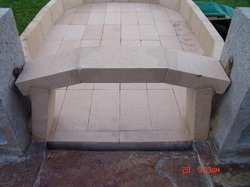
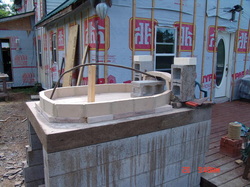
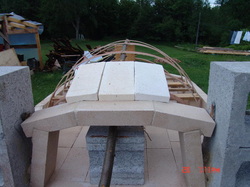
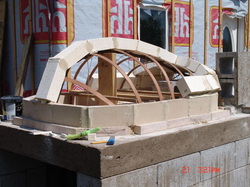
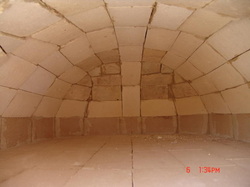
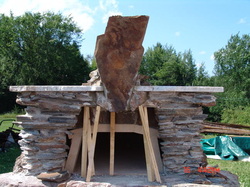
Now to the exciting part of actually building the firebrick dome starting with the hearth bricks and the door frame, plus the cinder blocks that will support the stone frame.
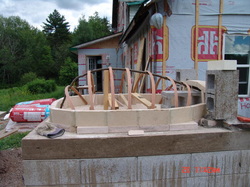
I chose to use two different types of fire brick. The hearth brick, the first row of the dome and the door frame are of a harder brick that will stand up to the abrasive action of putting wood in and scrapping ashes out of the oven. This is the type of brick you would find in a wood stove. In the dome proper I used a thicker brick that you would find in a pottery kiln. It is much softer but holds more heat. The form work to define the shape of the dome is adapted from old methods using alder branches to create the desired curve. I used 1/4" mahogany for the cross pieces. The shape of the dome is based on traditional Quebec outdoor ovens. The shape is sometimes compared to the back of a crouching beaver. The hard hearth fire brick required a wet saw to cut but the soft dome brick only needed a hack saw and an ordinary wood chisel for shaping. Be prepared to go through lots of hack saw blades though, the brick may be soft but it sure is abrasive and wears the teeth of the blades quite quickly. I formed both main arches of brick and then filled in each quarter of the remaining space. The outside of the dome looks like crap, but that's okay since it's going to be covered up anyways. The inside turned out pretty good; not a professional job by any means but it's solid and well formed. One note to make particular mention of. I used fire-clay to cement up the firebrick. This generally comes in pails, premixed like drywall compound, almost the same consistency as well. You don't work straight from that pail though. Fire-clay skins over real quick and that skin is hard and interferes with spreading the cement. You take out a small amount and put it in a covered container that you work from. Also, you need to keep the dome covered to ensure the fire-clay stays dry. Until it is set by the high heat of a fire the clay is water soluble and will come apart if it's rained upon. |
|
|
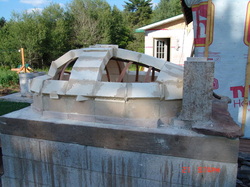
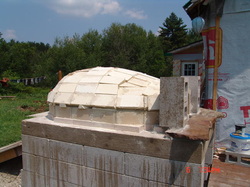
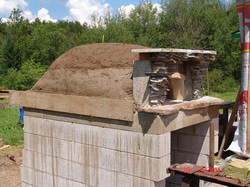
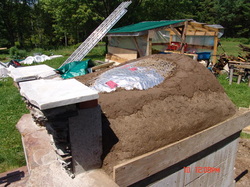
Putting the concrete layer over the dome can happen immediately since the fire-clay sets quickly and there is very little of it.
You first need to put a layer of foil over the dome, so your concrete cap doesn't bond to the dome. Then there needs to be some sort of soft buffer layer between the dome and the cement cap. I notice most instructions mention vermiculite, but I used a thin layer of roxul bat insulation. It has a high tolerance to heat, not melting until reaching 1900 degrees F. The purpose of the buffer layer is to accommodate the expansion of the dome when it heats up. You don't need much room, the dome isn't going to move that much, but it is important since the concrete cap is not flexible at all. This cap is not structural, it simply provides a good thermal mass to hold heat a long time. Thus, I used a dry-pack type of concrete, which is a concrete and aggregate mixture with just enough water to hold it together. This method provides a mix that will hold its shape, is a bit more flexible and not as dense as a normal mixture of concrete. |
|

|
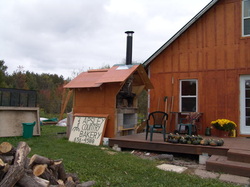
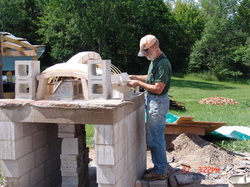
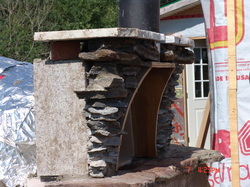
Once the cap is complete the oven is essentially finished and is usable. Everything else is simply meant to make it pretty. Which of course takes the longest amount of time and usually the largest amount of money. Fortunately for me, I'm cheap and I had materials ready at hand to keeps the coin consumed down to something I could tolerate.
With that in mind though I must say I'm pleased with the way it is looking. I have to admit the look is quite accidental, since the way I normally work is to simply think of things as I go along and let the structure tell me what it needs. So, I hadn't planned on making the shelf above the hearth opening, but I had a scrap piece of marble about the right width, and when cut in half there was a gap above the door that obviously required a key stone. And the stone just happened to be among the pile that I gathered from the property. |
One note that is of particular importance so I put it over here.
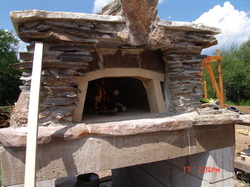
The volume of hot air and smoke that comes out of the oven when it has a fire in it is quite large and I hadn't taken enough consideration of that to begin with. Luckily I put some test fires into the oven before getting too much further along with the hearth front and I noticed that lots of smoke was coming out in front of the opening and not going up the chimney. So I had the opportunity to reshape the flue opening and put in an 8" pipe, which I also just happened to have, and the problem resolved. Another aspect of this issue is that because there is essentially no control over the fire, there's just the door opening and the fire burns as quickly as it wishes and smoke and hot air leave even quicker, I didn't think the chimney was going to influence the performance of the burn just simply serve to clear the smoke away. Yet, with the bigger flue diameter the fire does perform better. |
|
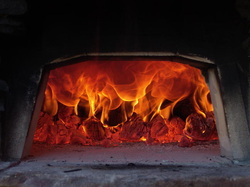
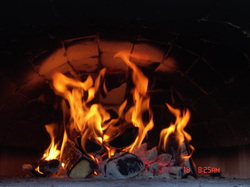
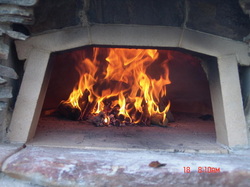
Of course, since the oven is complete enough to actually use, there is the agonizing wait as the cap dries. But then came the day we could put our first fire in it and see if it actually works.
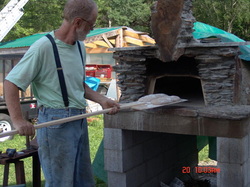
Since we can now put heat in the oven why not bake some bread. So we loaded some in the oven with a peel I made myself, since I have plenty of wood and not a clue where I was going to buy one. |
|
|
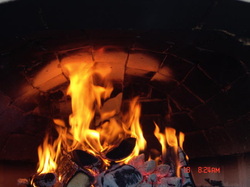
Beyond this stage it is just a matter of continuing the work of making the oven attractive and seeing just how many loaves of bread we can put through it. So far the oven is performing marvelously, retaining plenty of heat for baking and being quite warm still, roughly 300 degrees F, the next morning. This with about a 4 hour burn each morning.
I'll be covering how we fire the oven and bake bread in the Oven Management section of the website. |
|